Applying Etter’s Modern Technical Writing Principles to Host an Online Resume and README
COMP 3040 Assignment 2 | Alborz Khakbazan | Fall 2022
Purpose
The goal of this readme is to describe the practical steps of how to host and format a resume using GitHub Pages and Markdown. Additionally, it will relate these steps to the general principles of current Technical Writing, as explained in Andrew Etter’s book Modern Technical Writing. This guide is intended for novice computer science students, and requires only a limited understanding of these technologies. It is also intended for users on a Windows operating system.
You can see what the final product will look like here.
Table of Contents
Prerequisites
-
Create a GitHub account.
-
Get some familiarity with Markdown - for a quick resource to refresh your memory, see Wordpress’ reference guide or GitHub’s documentation. Alternatively, you can complete this tutorial if you’re just learning Markdown for the first time.
-
Download Obsidian (or some other Markdown editor capable of editing GitHub Flavored Markdown).
-
Create a Markdown-formatted resume (You can do so easily using Obsidian).
-
Optional: If you are unfamiliar with git commands, it may help to download GitHub Desktop to make commits easier. We will be using it for the purposes of this guide.
-
Why use Markdown?
- Markdown corresponds to Etter’s key principle on using a lightweight markup language. This is because lighweight markup is easier to read and write in, making it much more widely accessible and allowing for more people to contribute to documentation. Etter specifically recommends Markdown because it is the most widely used lightweight markup language and is more future-proofed than other options.
-
Instructions
This is a step-by-step demonstration on how to host a resume on GitHub Pages, while also relating to Modern Technical Writing’s key principles.
-
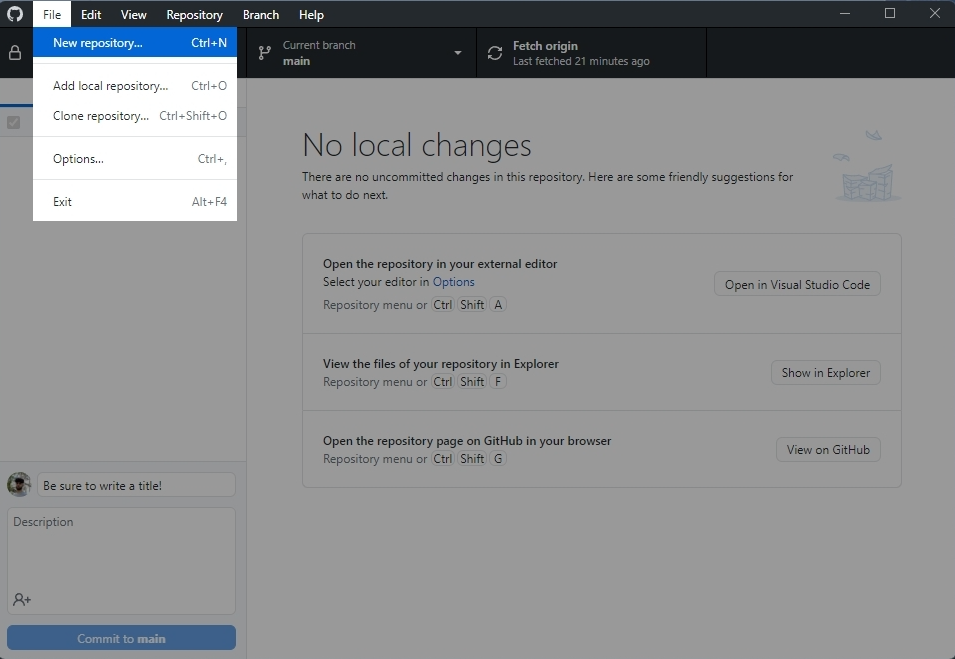
Create a new GitHub repository called
[YourUsername].github.io. For example, you can see that this repository is calledalborzk.github.io.- On Github Desktop, you can do this by clicking File > New Repository.
-
Why use GitHub?
- GitHub corresponds to Etter’s key principle on using distributed version control. It provides better performance, facilitates concurrent work on the same file, and makes it easy to undo changes. It also makes your job easier, since a developer, tester, or experienced user can make changes to the documentation easily if something is incorrect or out of date.
- On Github Desktop, you can do this by clicking File > New Repository.
-
Commit your markdown-formatted resume to your GitHub repository.
-
On GitHub Desktop:
-
First, add the resume to your local repository by clicking Repository > Show in Explorer and moving or copying your resume.md file to the folder that opens.

-
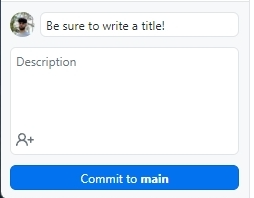
Once the resume has been added to your local repository, you can commit your changes to the remote repository using the “commit” panel at the bottom left. Be sure to fill in an appropriate title for the commit.
-
-
-
Push your changes to the remote repository.
-
On GitHub Desktop:
- To push your changes to the remote repository, press “push origin” on the main screen. The option should appear after you create a commit, and may require you to “pull” changes first if your local repository isn’t up to date.

- To push your changes to the remote repository, press “push origin” on the main screen. The option should appear after you create a commit, and may require you to “pull” changes first if your local repository isn’t up to date.
-
-
Your resume should now be on the GitHub repository. Navigate to the repository in a browser by visiting
github.com/[YourUsername]/[YourRepositoryName], and check to make sure your uploaded files are all there. -
Now that the repository has been set up, we will set up a static site to host the resume using Github Pages and Jekyll.
-
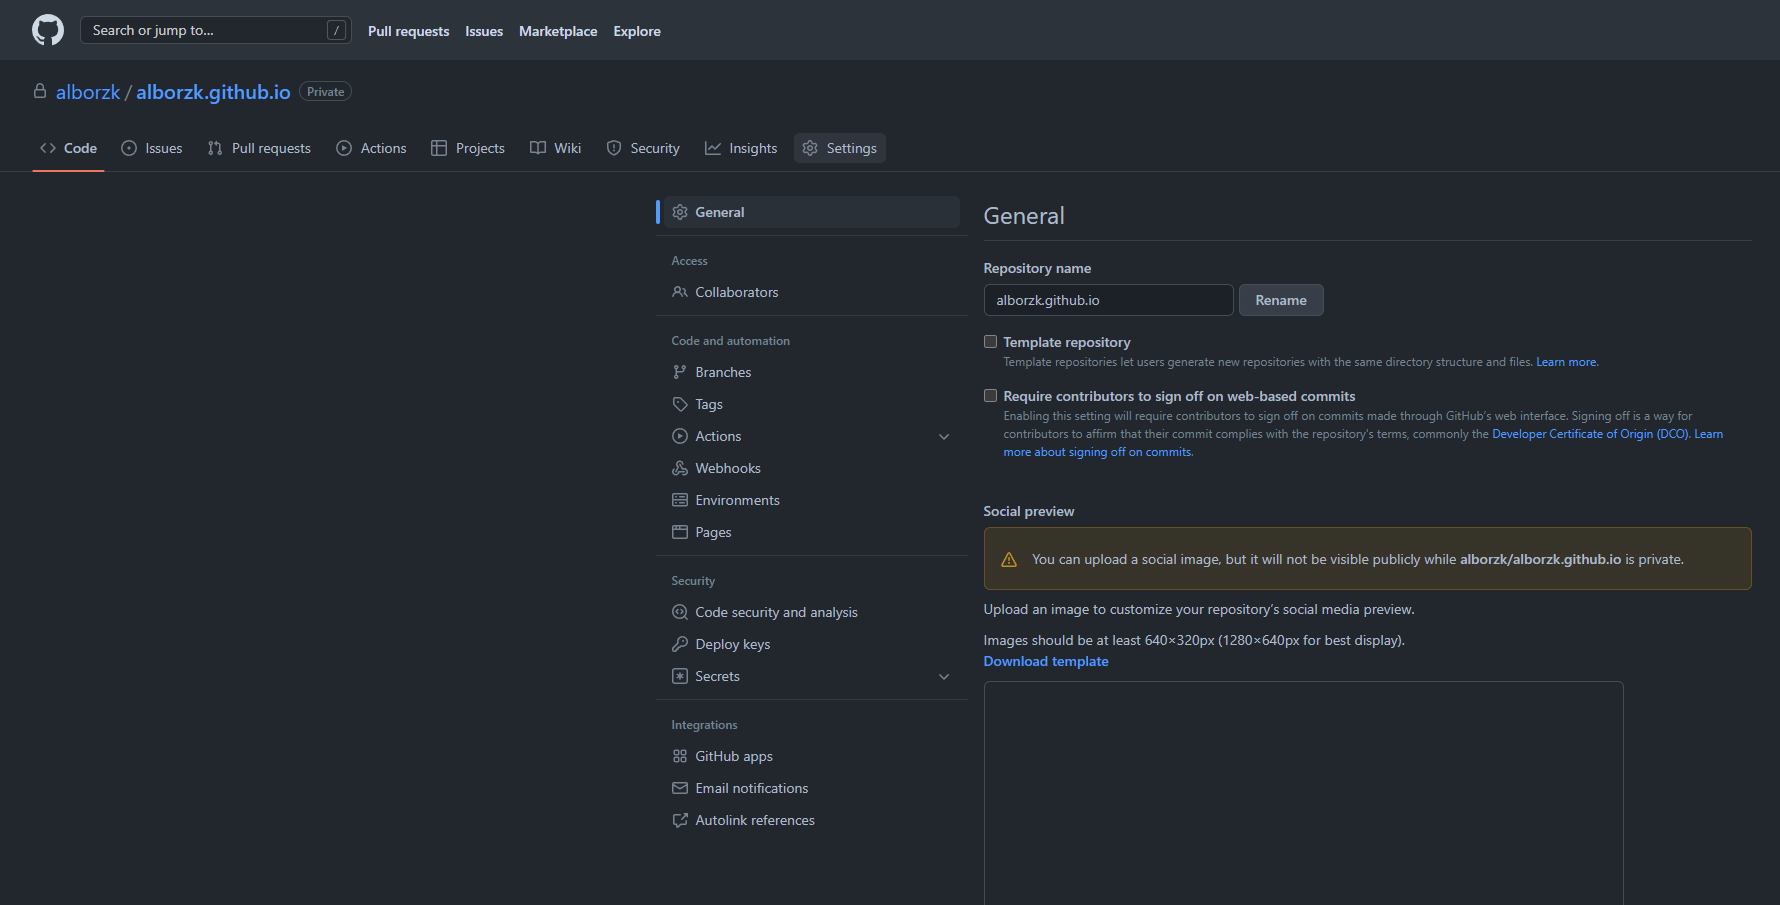
Navigate to the settings of the GitHub repository.
-
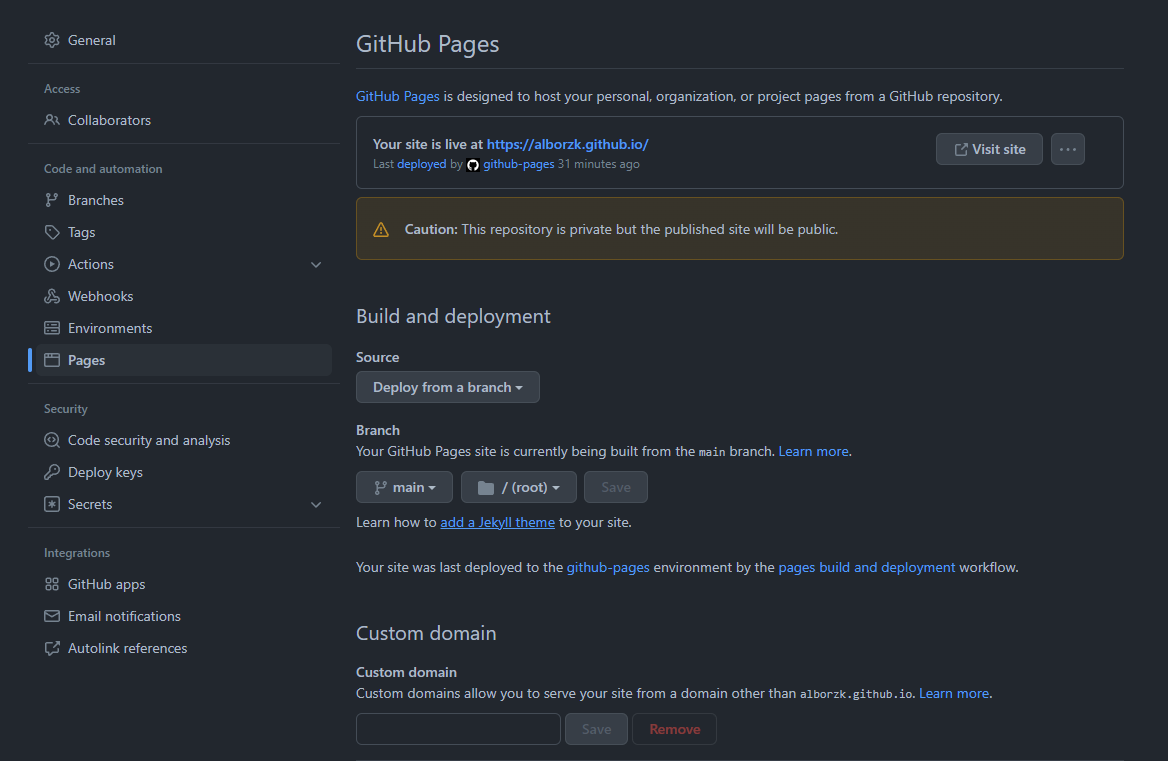
Select the “GitHub Pages” tab and ensure that your you have “Deploy from a branch” selected for the source setting, and the “main” branch and “root” folder for the branch setting.
-
GitHub Pages will automatically build and deploy your static site from the resume file you uploaded in Markdown, and let you know when the build is successful. For the initial setup, this process may take anywhere up to an hour.
-
Why use GitHub Pages?
- GitHub Pages corresponds to Etter’s key principle on using static sites. Etter recommends static sites because they are very simple, and are not prone to crashes or hacks.
-
-
Next, we will make our static site beautiful with the Jekyll theme of our choosing.
-
First, find a theme that you like. Don’t worry about making the perfect choice - you can always come back and change it later.
-
From your file explorer window of the repository, create a new text file called “_config.txt”, and edit it to contain the text:
theme: jekyll-theme-[ThemeName]. For example, this repository uses the Cayman theme - and you can see that the _config file contains the texttheme: jekyll-theme-[cayman]. -
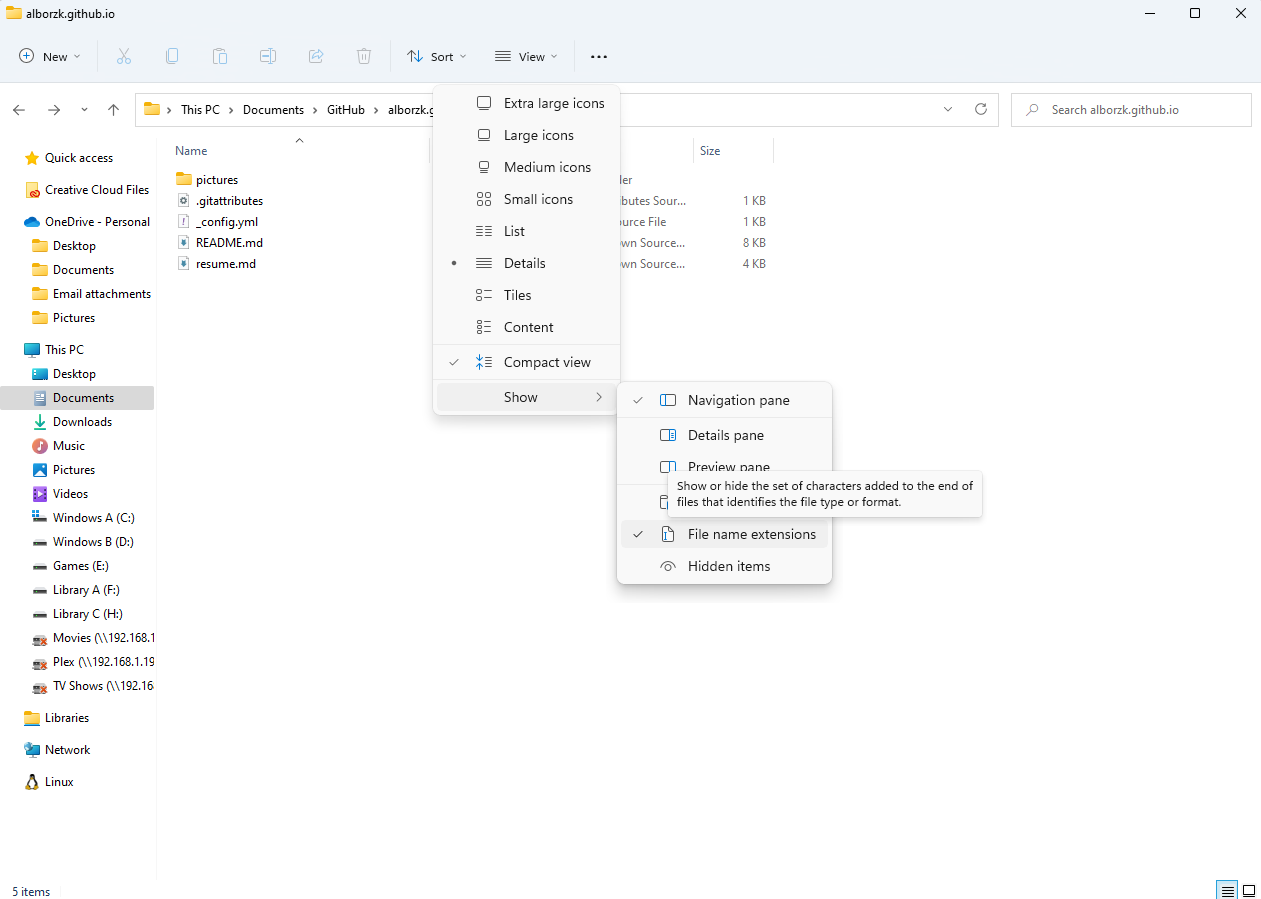
Rename the “_config.txt” file, changing its filetype to “_config.yml” instead. If you cannot see the filetypes when renaming your file, ensure you have them visible by selecting “View > Show > File name extensions” in your file explorer window.
-
Using the process seen in steps 2 and 3 above, commit and push this new file to your remote repository.
-
Why use Jekyll?
- Jekyll corresponds to Etter’s key principle on using static site generators. Etter recommends these because they can help create beautiful, functional static sites with minimal effort.
-
-
Your resume should now be visible on GitHub Pages at
[RepositoryName]/[ResumeFilename]. For example, the resume that was built for this repository is hosted on GitHub Pages with the link:https://alborzk.github.io/resume, where RepositoryName isalborzk.github.ioand the ResumeFilename isresume. If not, try waiting a few minutes for the website to be deployed and reload the link, or see the FAQ. -
Done! Congratulations, and enjoy your new online resume.
More Resources
- Modern Technical Writing By Andrew Etter
- Markdown Tutorial
- Wordpress Markdown Cheatsheet
- GitHub Documentation
Authors and Acknowledgements
-
Written by: Alborz Khakbazan
-
Edited by:
-
Noah Curoe
-
Kunal Rajpal
-
Tristan Dyck
-
-
Jekyll Theme: Cayman
-
Template Credit:
-
University of Manitoba
-
Course: COMP 3040 A01, Fall 2022
-
Course Instructor: Stewart Wilcox
-
Frequently Asked Questions
Why is Markdown better than a word processor?
- Markdown is a markup language that is designed for the web, and to have CSS run through it with ease. This is why websites use markup languages instead of Microsoft Word .docx files - you can see how messy that would look by the source code for a .docx file.
I can see the README but not my resume. What’s wrong?
- If this is the case, make sure you are being specific with the url you are visiting. Instead of viewing
https://RepositoryName/ResumeFilename, you might be viewinghttps://RepositoryNameorhttps://RepositoryName/ReadmeFilename.